Thymeleaf integration with Spring (Part 2)
mongoDB, Spring, Spring MVC, Thymeleaf ·This is the second part of the Thymeleaf integration with Spring tutorial. You can read the first part here, where you will learn how to configure this project.
As explained at the beginning of the first part of this tutorial, the web application will send two types of requests:
-
Insert a new guest: Sends a synchronous request to the server for adding a new guest. This will demonstrate how Thymeleaf is integrated with Spring’s form backing beans.
-
List guests: Sends an AJAX request that will update a region (fragment) of the page in order to show the guest list returned from the server.
Let’s see how we will accomplish this.
1 Handling forms
In this section we are going to see how a form is submitted with Thymeleaf. We will basically need three attributes:
th:action
th:object
th:field
The first two are defined in the form element:
<form id="guestForm" th:action="@{/spring/guests/insert}" th:object="${guest}" method="post">
The th:action attribute rewrites the action url, prefixing the application context to it.
The th:object attribute in the form element is the object selection. It can then be referenced within the form. What we do here is bind the form backing bean to the model attribute, which we defined in the controller before rendering the view:
@ModelAttribute("guest")
public Guest prepareGuestModel() {
    return new Guest();
}
As we see, th:object refers to the Guest form backing bean, while th:field will refer to its properties. Take a look at the form body:
<span class="formSpan">
    <input id="guestId" type="text" th:field="*{id}" required="required"/>
    <br />
    <label for="guestId" th:text="#{insert.id}">id:</label>
</span>

<span class="formSpan" style="margin-bottom:20px">
    <input id="guestName" type="text" th:field="*{name}" required="required"/>
    <br />
    <label for="guestName" th:text="#{insert.name}">name:</label>
</span>
What th:field will do is assign the value of its input element to the backing bean property. So, when the user submits the form, all these th:field will set the form backing bean properties.
At the controller, we will receive the Guest instance:
@RequestMapping(value = "/guests/insert", method = RequestMethod.POST)
public String insertGuest(Guest newGuest, Model model) {
    hotelService.insertNewGuest(newGuest);

    return showHome(model);
}
Now the guest can be inserted into the database.
2 Sending AJAX requests
When trying to find a simple example of sending an AJAX request with Thymeleaf, I have found examples with Spring Webflow (render fragments). I also read others saying that you need Tiles in order to accomplish that.
I didn’t want to use those frameworks so in this section I’m using jQuery to send an AJAX request to the server, wait for the response and partially update the view (fragment rendering).
The form
<form>
    <span class="subtitle">Guest list form</span>
    <div class="listBlock">
        <div class="search-block">
            <input type="text" id="searchSurname" name="searchSurname"/>
            <br />
            <label for="searchSurname" th:text="#{search.label}">Search label:</label>
            <button id="searchButton" name="searchButton" onclick="retrieveGuests()" type="button"
                    th:text="#{search.button}">Search button</button>
        </div>

        <!-- Results block -->
        <div id="resultsBlock">

        </div>
    </div>
</form>
This form contains an input text with a search string (searchSurname) that will be sent to the server. There’s also a region (resultsBlock div) which will be updated with the response received from the server.

When the user clicks the button, the retrieveGuests() function will be invoked.
function retrieveGuests() {
    var url = '/th-spring-integration/spring/guests';

    if ($('#searchSurname').val() != '') {
        url = url + '/' + $('#searchSurname').val();
    }

    $("#resultsBlock").load(url);
}
The jQuery load function makes a request to the server at the specified url and places the returned HTML into the specified element (resultsBlock div).
If the user enters a search string, it will search for all guests with the specified surname. Otherwise, it will return the complete guest list. These two requests will reach the following controller request mappings:
@RequestMapping(value = "/guests/{surname}", method = RequestMethod.GET)
public String showGuestList(Model model, @PathVariable("surname") String surname) {
    model.addAttribute("guests", hotelService.getGuestsList(surname));

    return "results :: resultsList";
}

@RequestMapping(value = "/guests", method = RequestMethod.GET)
public String showGuestList(Model model) {
    model.addAttribute("guests", hotelService.getGuestsList());

    return "results :: resultsList";
}
The results list
Since Spring is integrated with Thymeleaf, it will now be able to return fragments of HTML. In the above example, the return string “results :: resultsList” is referring to a fragment named resultsList which is located in the results page. Let’s take a look at this results page:
<!DOCTYPE html>
<html xmlns="http://www.w3.org/1999/xhtml"
    xmlns:th="http://www.thymeleaf.org" lang="en">

<head>
</head>

<body>
    <div th:fragment="resultsList" th:unless="${#lists.isEmpty(guests)}" class="results-block">
        <table>
            <thead>
                <tr>
                    <th th:text="#{results.guest.id}">Id</th>
                    <th th:text="#{results.guest.surname}">Surname</th>
                    <th th:text="#{results.guest.name}">Name</th>
                    <th th:text="#{results.guest.country}">Country</th>
                </tr>
            </thead>
            <tbody>
                <tr th:each="guest : ${guests}">
                    <td th:text="${guest.id}">id</td>
                    <td th:text="${guest.surname}">surname</td>
                    <td th:text="${guest.name}">name</td>
                    <td th:text="${guest.country}">country</td>
                </tr>
            </tbody>
        </table>
    </div>
</body>
</html>
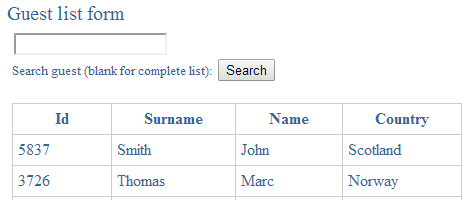
The fragment, which is a table with registered guests, will be inserted in the results block:
3 Conclusion
After integrating both frameworks, we learnt how forms are linked to the Spring MVC model. We also learnt how to send AJAX requests and partially update the view.
I’m publishing my new posts on Google plus and Twitter. Follow me if you want to be updated with new content.